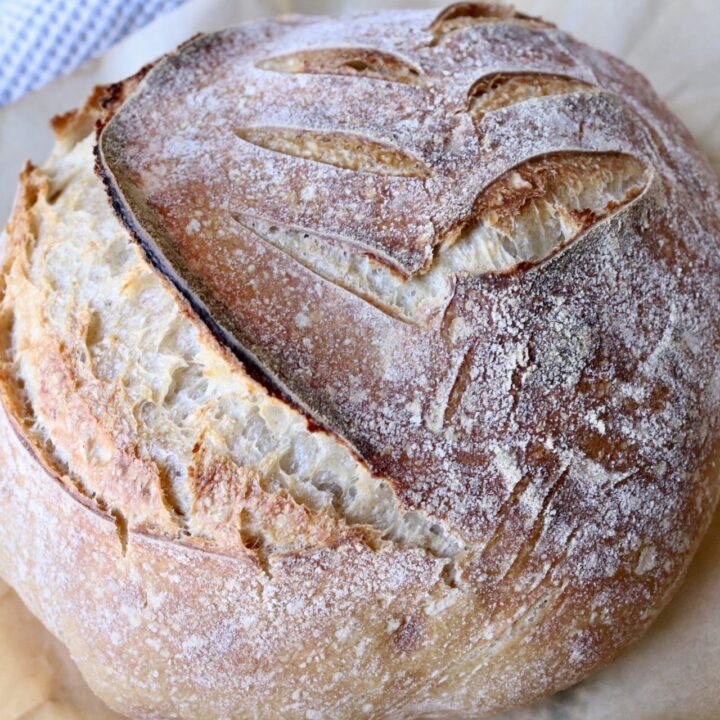
Artisan Sourdough Bread – Made Simple!
Artisan sourdough bread made simple! No need to overcomplicate a simple and straightforward process! Anyone can learn how to do this! Add this traditional skill to your homemaking tool belt and make fluffy loaves with crispy crusts that will have you absolutely loving the process and the results!
In a hurry?… Pin it for later!

Scroll down for detailed step-by-step instructions (with photos), recipe card, and a sample bakers schedule!
Sometimes sourdough can be way too overcomplicated and leaves people feeling overwhelmed with all the grams, charts, hydration levels, crumb, etc. etc. While all these have their place for sure, it can leave a beginner to sourdough not even knowing where to start and not sure they even want to try it anymore.
If you are a beginner to sourdough, or even an experienced baker, this recipe is for you! You will be turning out loaves that look and taste amazing in almost no time and with just a little practice.
This recipe use only sourdough starter so absolutely no active yeast and the loaves are so fluffy and soft!
What’s better yet is that there is no kneading required! Yay! Learn how to do simple stretch and folds to develop the gluten structure instead of kneading and give your arms a break. This also helps to develop those air bubbles that give the bread its airy texture. It looks amazing too!
Reasons to love artisan sourdough bread…
- Using sourdough starter instead of yeast in your baking add loads of health benefits and makes for a finished product that is totally different than those made with yeast.
- It tastes absolutely amazing!
- It is easy to learn how to make and use sourdough starter.
- No kneading!
- Uses just 4 ingredients! Yep, you read that right! Only 4 ingredients that you most likely already have on hand in your pantry.

This artisan sourdough bread can be made in the same day or long fermented overnight…
This bread is totally possible to make in one day if you choose! You can mix it up in the morning and use warmth from your oven light or another source to help it rise faster so you can have fresh bread in that same evening.
Why measure in grams?…
Weight is a lot more accurate than measuring in cups. While you can measure in cups and I’ve done so with success, I find that I get more consistent results in my sourdough breads when using measurements of weight. Using a digital scale makes this extremely easy since I can tare between each ingredient and set it to whatever unit of measurement I am using.
Sometimes when you buy pre-ground flour it has settled during proccessing and shipment and as a result is not quite as light as freshly milled grain. Measuring by weight insures that your dough will not become too dry from adding too much flour and you can use whatever flour you have available knowing that you will have great results every time.
I have included measurements of volume as well if you would rather use those. Use whatever is easiest for you and you’re most comfortable with! If weighing everything out is what’s complicating it for you and keeping you from making your own sourdough bread then just use cups!
Ingredients for artisan sourdough bread – made simple :
- Organic all-purpose flour (500 grams – about 4 cups) – I like to use unbleached all-purpose flour and organic whenever possible.
- Water (400 grams – 1 1/2 cups) – purified or filtered water is best.
- Salt (10 grams – 1 1/2 tsp.) – I use pink himalayan salt or sea salt.
- Active sourdough starter (100 grams – 1/2 cup) – make sure your starter is active and bubbly.
Instructions for artisan sourdough bread: Step-by-Step
Make sure your starter is active and bubbly! Feed 4-12 hours before mixing up your bread to insure it is well active.


7. Cover and let the dough rest for 30 minutes before stretch and folding.
How to stretch and fold:
Wet your hands with a little water then simply take hold of the dough, stretch it up, then fold it back on itself. Rotate the bowl 1/4 of a turn and repeat. Repeat until you’ve stretched and folded a total of 4 times and have made a full circle.
You will want to do anywhere between 4 and 6 stretch and folds. I usually try to aim for 6 but if that many doesn’t happen, oh well! Wait 15-30-ish minutes between each time of doing a full circle of stretch and folds. This develops the gluten and gives the bread it’s unique texture.
8. Once stretch and folds are complete, cover the bowl with plastic wrap or a damp towel and place somewhere warm to bulk ferment. This will take about 6 hours depending on the warmth of your home and the maturity and activity level of your starter. If the house is a little chilly I often will put mine in the oven with the light on. There is just enough heat from the light that it makes my bread rise very nicely and fairly quickly.
Once dough has doubled and/or you can press your finger in it slightly and it doesn’t spring back quickly it is ready to move to a proofing basket…


This is where you can choose to let it ferment in the fridge overnight, or if you need bread that same day, place it back in your oven with the light on. Doing an overnight rise in the fridge will make scoring it easier and the pattern will stand out more but this is not absolutely needed.
If you are making it same day, let if proof (put it in the oven with the light on your home is chilly) for 1-3 hours. You have to depend on visual cues a lot with this as far as how to tell when it is ready to bake. It is ready when it looks slightly puffy and and has risen some. It most likely will not double in size though. Another way to tell is to get your finger wet and press it into the dough. If it springs back quickly it needs to raise longer. If the dough stays indented or comes back slowly it is time to bake.


Sample Bakers Schedule for Artisan Sourdough Bread:
| 8:00 p.m – the night before | Feed your starter the night before to speed up the process the next day. Or you can feed in the morning and wait 4 hours before using. |
| 7:00 a.m. | Combine flour and water and combine. |
| 7:30 a.m. | Add starter and salt to dough and combine well. |
| 8:00 a.m. | Stretch and fold. |
| 8:15 a.m. | Stretch and fold. |
| 8:30 a.m. | Stretch and fold. |
| 9:00 a.m. | Stretch and fold. |
| 9:30 a.m. | Stretch and fold. |
| 10:00 a.m. | Stretch and fold. Cover and let rise in a warm place until doubled. |
| 2:30 p.m. | Transfer to a floured surface, shape, then let sit uncovered for 20-30 minutes to develop a skin. |
| 3:00 p.m. | Move to floured banneton basket, cover and let proof in a warm place or place in the fridge overnight to be baked the next day. |
| 5:00 p.m | Preheat dutch oven. |
| 5:30 p.m. | Transfer loaf to parchment paper and score. Place in preheated dutch oven. |
| 5:40 p.m. | Bake for 20 minutes with the lid on. Remove lid and bake for 15-20 minutes more until crust has browned. |
| 6:20 p.m. | Remove loaf from dutch oven and place on a cooling rack. Enjoy! |
Pin it for later!

Artisan Sourdough Bread
Artisan sourdough bread made simple! No need to overcomplicate a simple and straightforward process! Anyone can learn how to do this! Add this traditional skill to your homemaking tool belt and make fluffyloaves with crispy crusts that will have you absolutely loving the process and the results!
Ingredients
- 500 grams organic all-purpose flour (about 4 cups)
- 400 grams water (1 1/2 cups)
- 100 grams active sourdough starter (1/2 cup)
- 10 grams salt (1 1/2 tsp.)
Instructions
1. Place a large bowl on a digital scale and weigh out the flour.
2. Place a jar or some other vessel on the scale and measure the water.
3. Add the water to the flour and mix together.
4. Once the water is fully incorporated into the flour cover the dough and let it sit for 30 minutes so the flour can become hydrated.
5. Place bowl back on the scale, tare it, then pour your starter on top of the dough. Weigh out the salt separately, then add that as well.
6. Using your hands or a spoon, mix until the starter is fully incorporated and no streaks of starter remain throughout. This takes a couple minutes. The dough will be very wet and sticky. This is perfectly normal.
7. Cover and let the dough rest for 30 minutes before stretch and folding.
How to stretch and fold:
Wet your hands with a little water then simply take hold of the dough, stretch it up, then fold it back on itself. Rotate the bowl 1/4 of a turn and repeat. Repeat until you’ve stretched and folded a total of 4 times and have made a full circle.
You will want to do anywhere between 4 and 6 stretch and folds. I usually try to aim for 6 but if that many doesn't happen, oh well! Wait 15-30-ish minutes between each time of doing a full circle of stretch and folds. This develops the gluten and gives the bread it's unique texture
8. Once stretch and folds are complete, cover the bowl with plastic wrap or a damp towel and place somewhere warm to bulk ferment. This will take about 6 hours depending on the warmth of your home and the maturity and activity level of your starter. If the house is a little chilly I often will put mine in the oven with the light on. There is just enough heat from the light that it makes my bread rise very nicely and fairly quickly.
Once dough has doubled and/or you can press your finger in it slightly and it doesn't spring back quickly it is ready to move to a proofing basket...
9. Flour a smooth surface and carefully transfer your dough to it. I use a rubber spatula to help with this. Try not to pop those beautiful air bubbles that have formed! Shape into a ball, then let it sit uncovered for 20 minutes to form a skin.
10. Transfer, seam side up, to a floured bannton basket or a bowl lined with a tea towel. Cover with plastic wrap or a damp tea towel.
- This is where you can choose to let it ferment in the fridge overnight, or if you need bread that same day, place it back in your oven with the light on. Doing an overnight rise in the fridge will make scoring it easier and the pattern will stand out more but this is not absolutely needed.
If you are making it same day, let if proof (put it in the oven with the light on your home is chilly) for 1-3 hours. You have to depend on visual cues a lot with this as far as how to tell when it is ready to bake. It is ready when it looks slightly puffy and and has risen some. It most likely will not double in size though. Another way to tell is to get your finger wet and press it into the dough. If it springs back quickly it needs to raise longer. If the dough stays indented or comes back slowly it is time to bake.
11. When you are ready to bake, preheat a dutch oven to °475. Dust a pice of parchment paper with flour and carefully transfer you dough. If desired, dust top of loaf with flour. Score with a razor then place in the dutch oven, parchment paper and all, and put the lid on.
12. Bake for 20 minutes with the lid on then remove the lid and bake for 15-20 minutes more until crust has browned.
Notes
- You can choose whether to feed your starter the night before or the morning of. It is really up to you and when you would like to have your bread ready by or how early you want to get up. If I happen to get started on making my bread later in the morning I usually will just do the second rise in the fridge so I'm not baking bread super late at night. Sourdough is really very flexible and it can usually fit around different schedules easily.
- Scoring patterns stand out a lot more when you do an overnight rise! It is easier to score and turns out prettier too but if you are planning on baking same day it still works well.
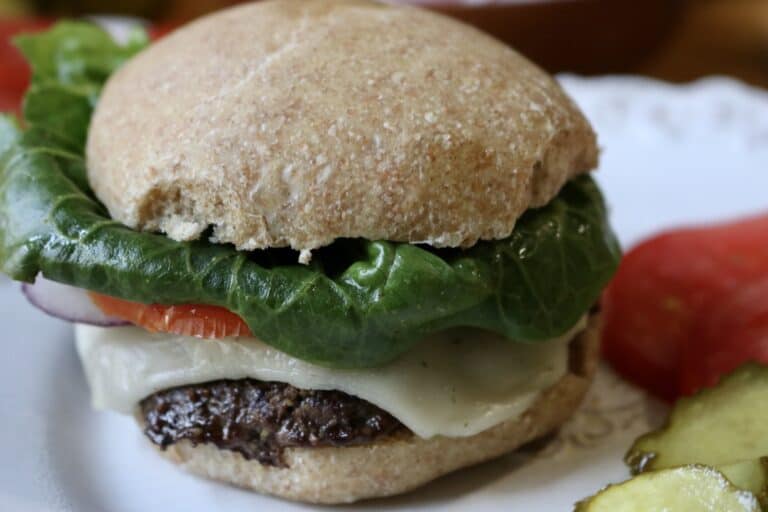
- You can substitute any of the all-purpse flour for whole grain if you prefer. The bread will be a bit more dense but tastes delicious!


Love the schedule! Makes it so easy and straightforward while learning how to do sourdough.